Building upper body strength should not leave your shoulders aching or your elbows throbbing. Pounding your joints with heavy overhead barbells or explosive push-ups usually leads to chronic inflammation, not long-term muscle. If you are a beginner this guide provides 5 low-impact upper body strength exercises to get you started.
Most adults over 40 don’t need more intensity. They need more consistency.
Low-impact upper body training focuses on controlled movement, stable joints, and sustainable strength. By using resistance bands and dumbbells, you build real muscle while allowing your connective tissue to recover safely. A few minutes of quality movement often works better than an hour of punishment.
Ready to Upgrade Your Conditioning?
- Once your movement foundation feels solid, it is time to build your endurace strength without joint stress. Check out: 7 Low-Impact Cardio Workouts for Joint-Friendly Fitness
Why Low-Impact Upper Body Workouts Protect Your Joints
Joint stress accumulates over time when workouts rely on rigid bar paths, heavy compression, or sudden changes in direction. Tendons and ligaments take significantly longer to adapt and repair than muscle tissue because they receive far less direct blood flow.
When you eliminate explosive impact and high-shear joint angles, you give your connective tissue room to strengthen safely. Low-impact routines prioritize controlled movement tempos and neutral grips. Resistance bands and dumbbells allow your shoulders and wrists to move through their natural anatomical paths. Strength builds the muscles guarding your shoulder girdle, while controlled tension improves local blood flow and calms tissue irritation.
Low-load resistance training paired with adequate recovery builds muscle endurance and joint integrity without unnecessary wear and tear.
5 Low-Impact Upper Body Exercises for Beginners
1. Banded Chest Press
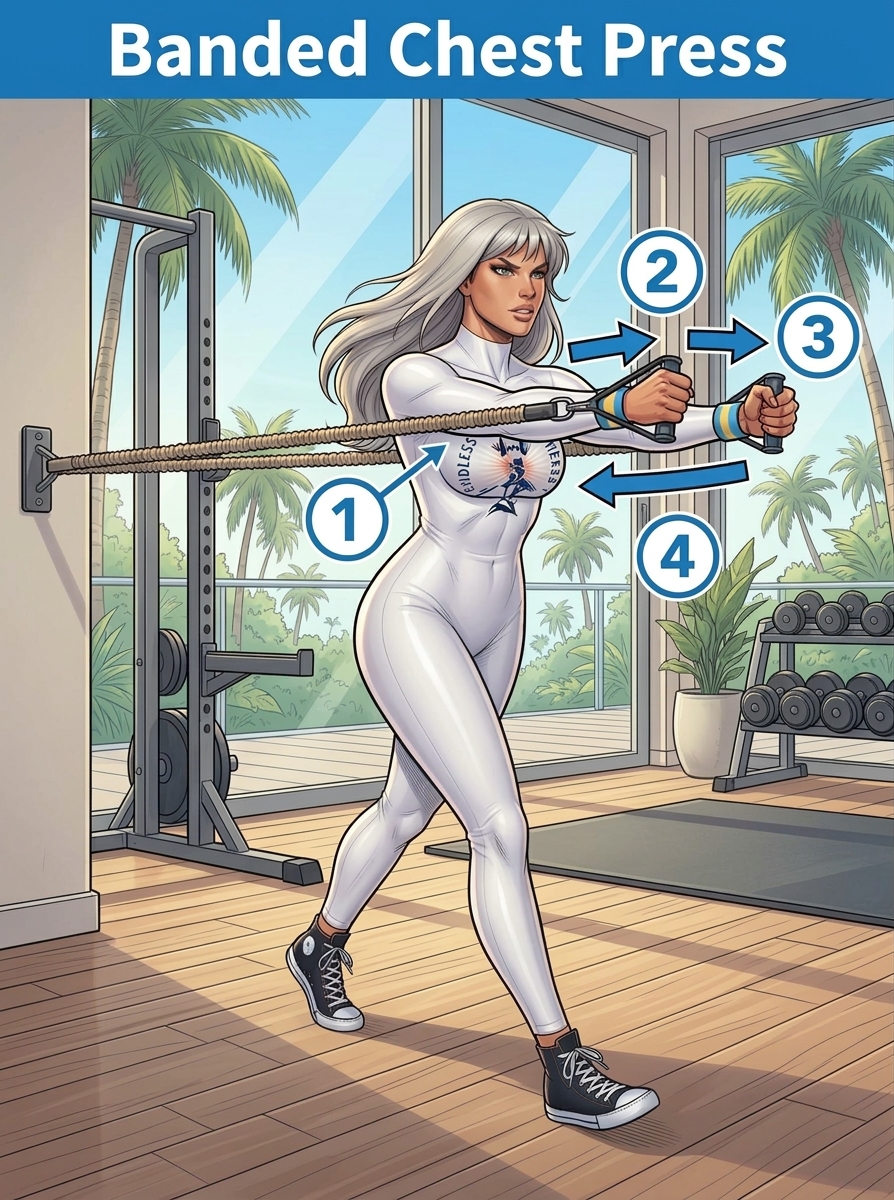
Pressing with a resistance band builds chest and arm strength without forcing your shoulders into fixed, awkward angles.
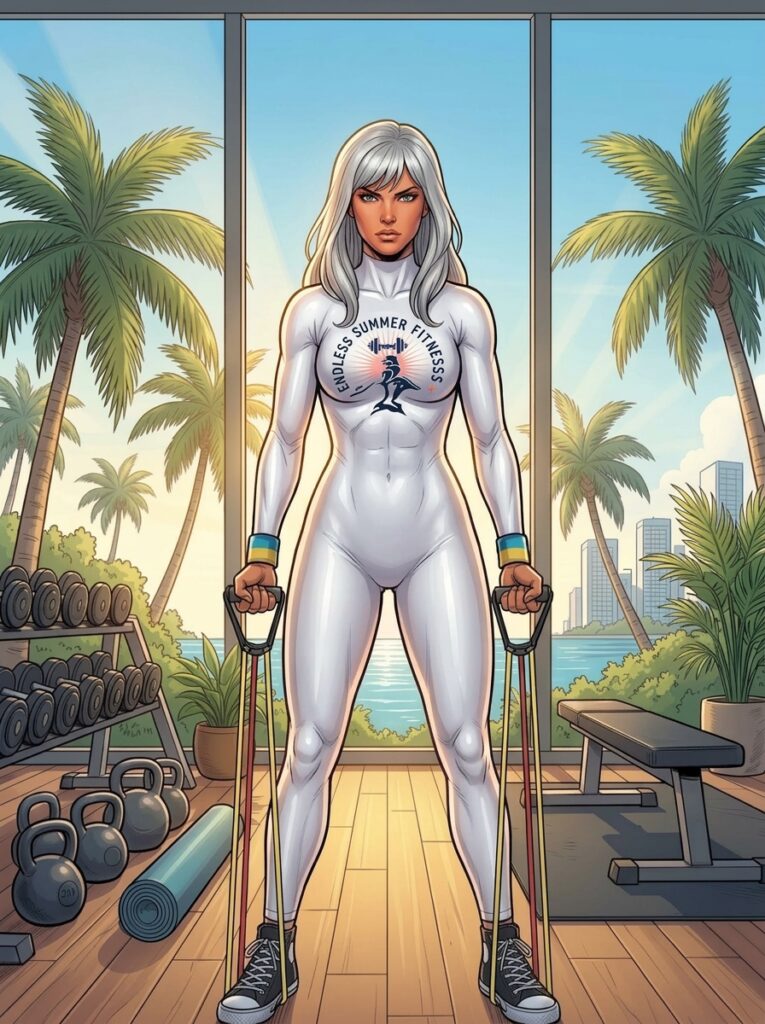
1. SETUP: Stand with an athletic, staggered stance (feet shoulder-width apart with one foot forward for stability), knees soft, core braced, and chest tall. Hold the resistance band handles near chest height with the band securely anchored behind you.
2. PRESS: Press both handles forward horizontally in a smooth motion, engaging your chest, shoulders, and triceps while maintaining a stable core and level hips.
3. EXTEND: Fully extend your arms forward with a slight bend maintained in the elbows, reaching maximum band tension and strong posture at peak contraction.
4. RETURN: Slowly and under full control, return the handles back toward your chest along the same path to complete the repetition.
Coaching Tip: Keep your shoulder blades pulled back and down against the chair. Avoid letting your shoulders hunch forward as you press.
2. Seated Band Row
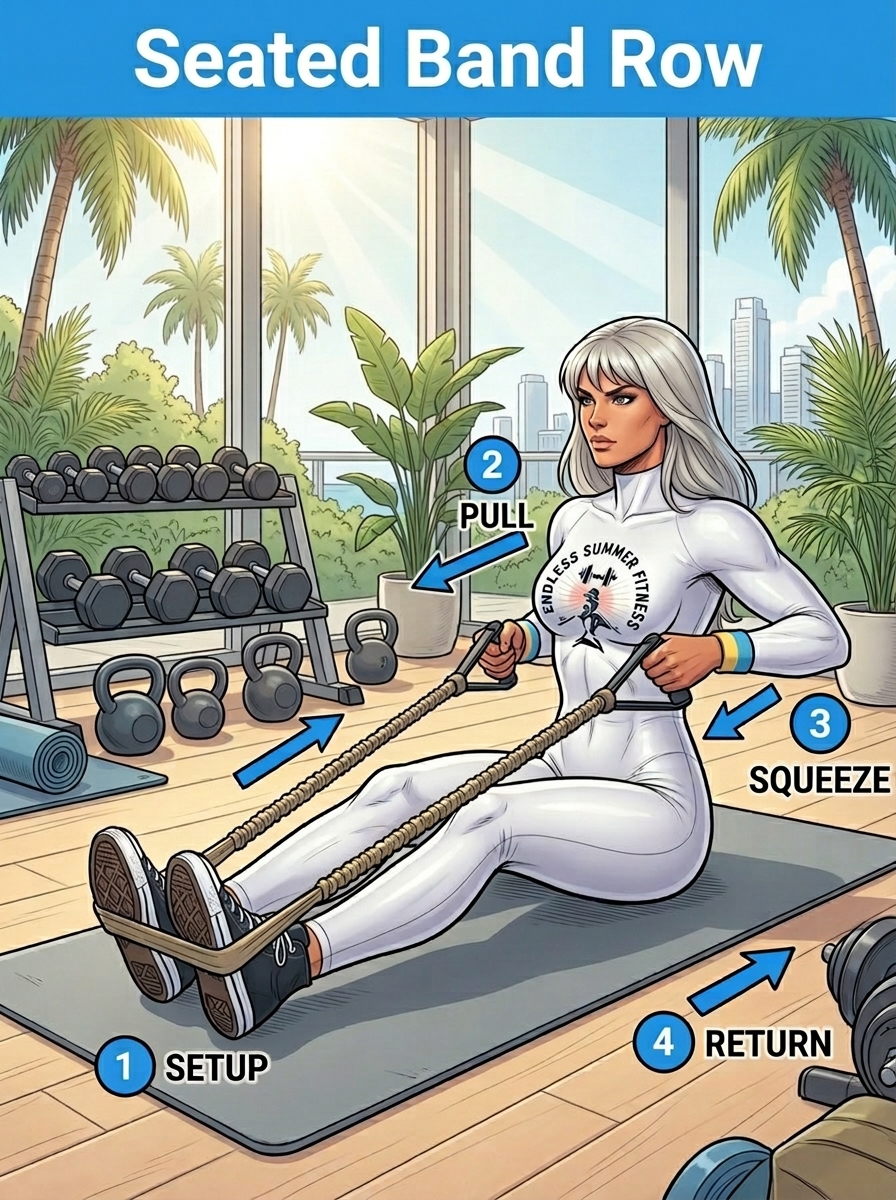
Horizontal pulling balances out daily sitting posture and keeps your shoulder blades gliding smoothly along your ribcage.
1. SETUP: Sit upright on the mat with legs extended straight forward, feet dorsiflexed, and the resistance band looped securely around both feet. Hold handles in both hands with arms straight.
2. PULL: Drive your elbows backward close to your torso while drawing the handles toward your lower ribs.
3. SQUEEZE: At peak contraction, squeeze your shoulder blades together while keeping your chest open, proud, and tall.
4. RETURN: Slowly and in a controlled manner extend your arms back to the starting position as the resistance band returns to its initial length.
Coaching Tip: Keep your spine tall and neutral. Avoid leaning backward to swing the weight toward your body.
3. Band Curl
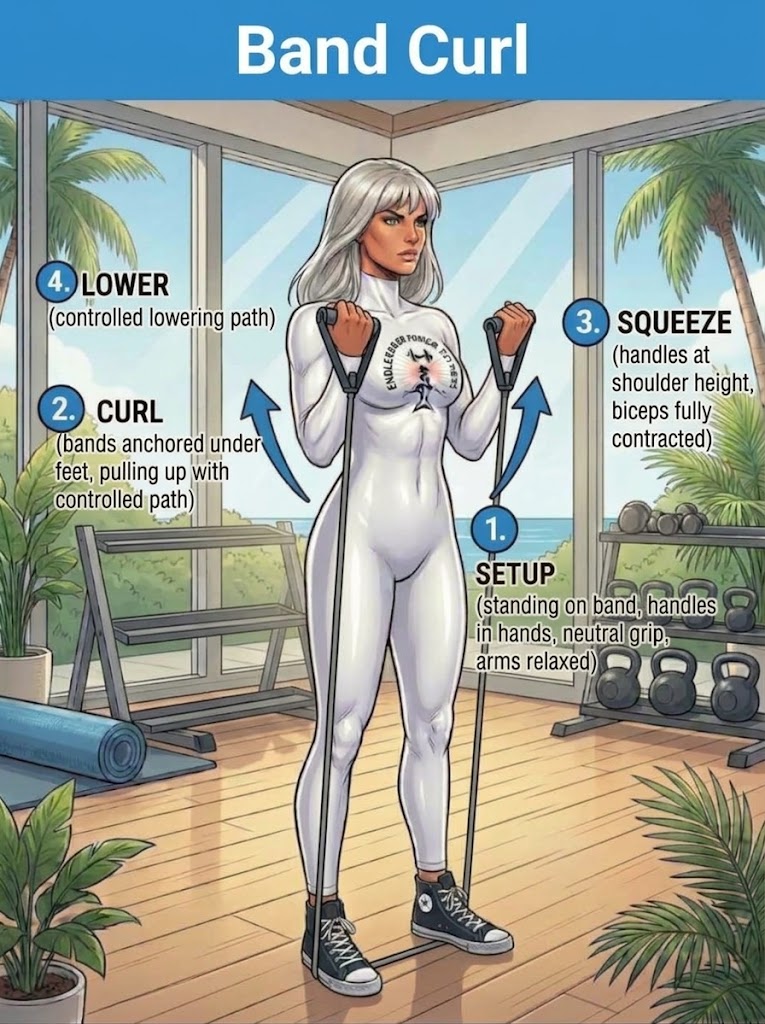
Using a neutral palm-facing-palm grip takes twisting strain off your wrists and elbows while targeting your arms.
1. SETUP: Stand tall with both feet standing on the band, holding the handles in your hands with a neutral grip and arms relaxed.
2. CURL: Pull upward along a controlled path with the band anchored securely under your feet.
3. SQUEEZE: Bring the handles up to shoulder height with your biceps fully contracted.
4. LOWER: Return to the starting position along a controlled lowering path.
Coaching Tip: Keep your torso completely still throughout the set. Do not swing your hips to create momentum.
4. Overhead Band Press
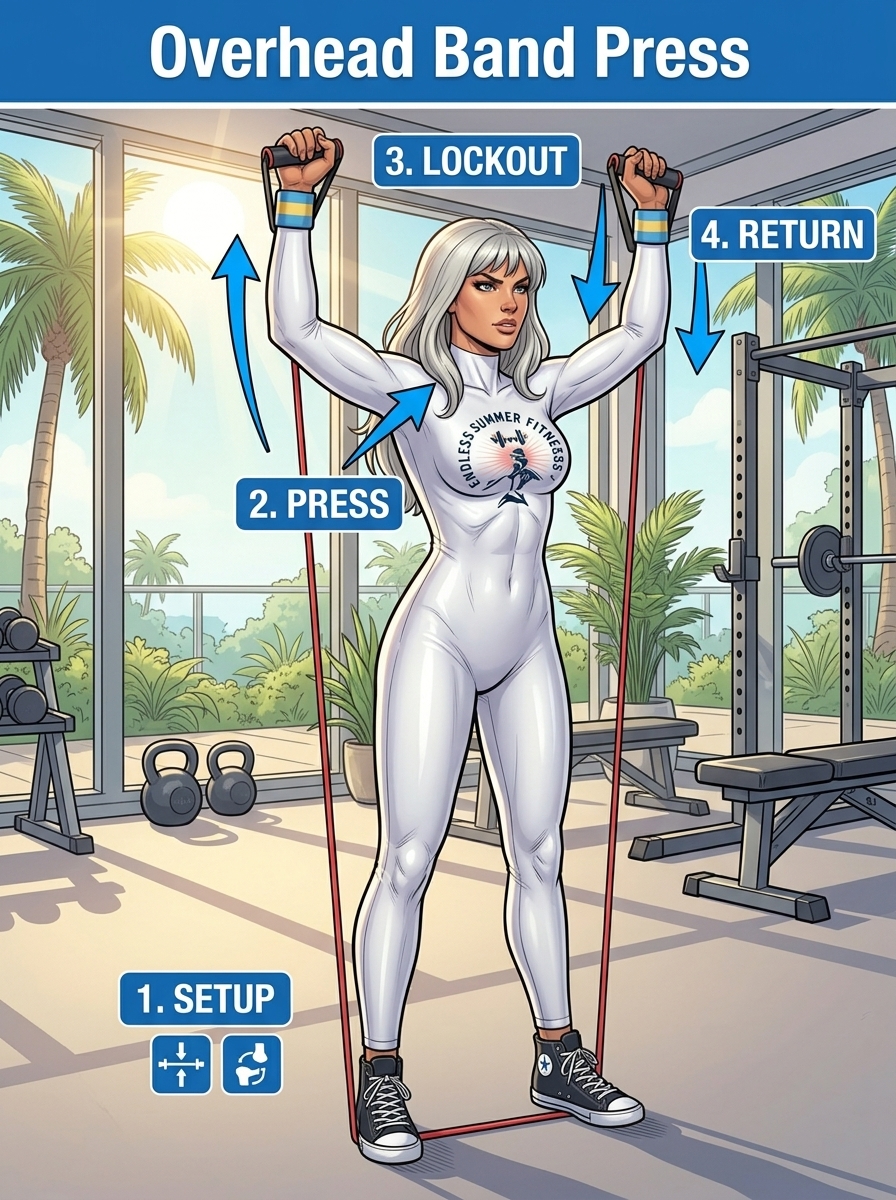
Pressing against elastic tension allows your shoulders to move naturally overhead without heavy joint compression.
1. SETUP: Stand tall with feet standing on the band (shoulder-width apart) and hold the handles at shoulder height with your core braced.
2. PRESS: Press the handles upward overhead along a vertical path while keeping your core stable and shoulders engaged.
3. LOCKOUT: Reach full arm extension overhead with the resistance band under maximum tension.
4. RETURN: Lower the handles back down to shoulder height along a controlled path to complete the movement.
Coaching Tip: Do not arch your lower back as you press overhead. If your shoulders feel tight, press the band slightly forward at a 30-degree diagonal angle.
5. Triceps Kickback with Band
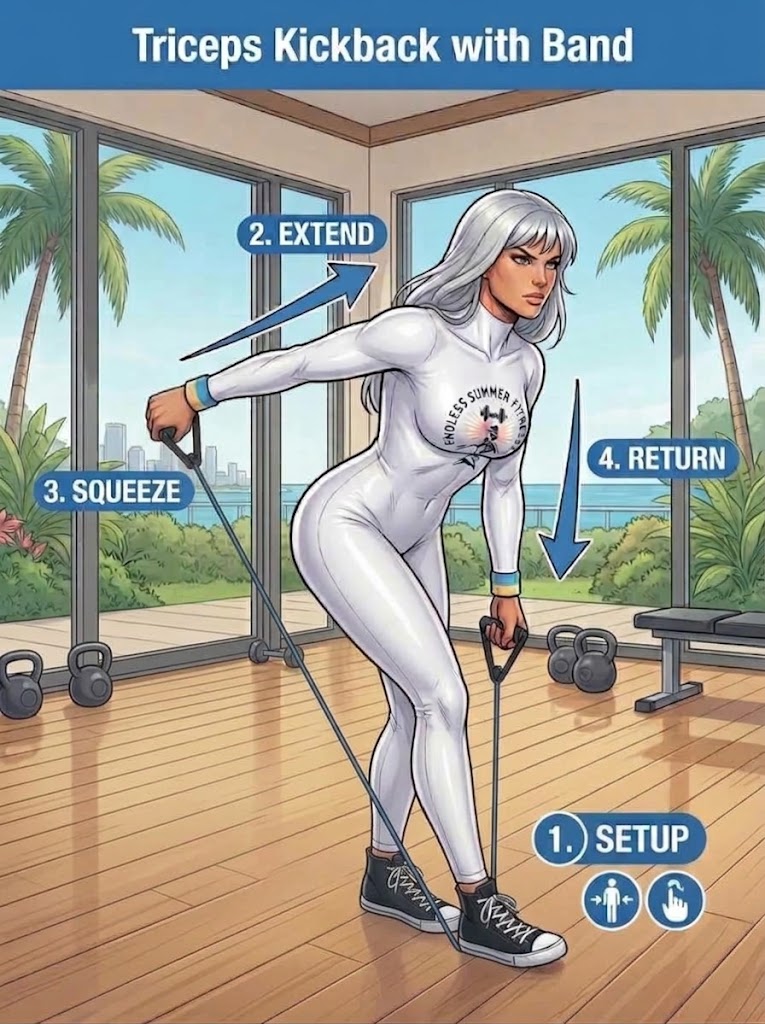
Isolating the back of your arms with band tension protects your elbows from the harsh locking forces of heavy barbells.
1. SETUP: Stand in a staggered stance with the resistance band anchored securely under your front foot, hinge forward slightly at the hips with a flat back, and hold the handle with your elbow pinned close to your torso.
2. EXTEND: Press the handle backward behind you along an upward arc, extending your arm fully while keeping your upper arm fixed and stable.
3. SQUEEZE: Pause briefly at full extension to fully contract and engage the triceps muscle.
4. RETURN: Slowly bend the elbow to return the handle back to the starting position under controlled tension.
Coaching Tip: Keep your upper arm locked firmly against your ribcage. All movement must come strictly from your elbow joint.
Key Exercise Mechanics Demonstrated
Understanding the biomechanics behind these movements ensures you build muscle safely:
Neutral Wrist Alignment: Keeping your palms facing each other during curls and presses reduces torque on elbow tendons and wrist joints.
Scapular Depression: Keeping your shoulder blades pulled down prevents upper trapezius compensation and avoids shoulder impingement.
Constant Band Tension: Elastic resistance increases load as the muscle contracts, providing smooth resistance without heavy initial joint compression.
Thoracic Alignment: Keeping your ribcage stacked over your pelvis prevents lower back hyperextension during overhead pressing.
Programming for Joint Longevity and Recovery
The goal is not to exhaust yourself. Sustainable fitness depends on balancing work with proper recovery.
Schedule two to three upper body or full-body strength days per week, allowing at least forty-eight hours of rest between sessions for the same muscle groups. Keep your sessions between thirty and forty-five minutes.
Always start with five minutes of dynamic movement, like shoulder circles, gentle torso twists, and arm swings, to lubricate your joints and warm up surrounding tissues. Save static stretching for after your workout to restore resting muscle length.
Key Research and Evidence
-
American College of Sports Medicine. Guidelines for resistance training frequency and tissue recovery in adults. https://www.acsm.org
-
National Academy of Sports Medicine. Upper extremity stabilization principles for mature populations. https://www.nasm.org
-
Journal of Strength and Conditioning Research. Load management and low-impact resistance training adaptations. https://journals.lww.com/nsca-jscr
Medical Disclaimer
This article is for educational and informational purposes only and does not constitute medical advice. Always consult a physician or certified fitness professional before beginning a new exercise program, especially if you have pre-existing medical conditions or chronic joint pain.